Category: Photography Page 11 of 24

Tips and guides for readers who want to take better photos to display on their Nixplay Frames.

2018 Photo Trends and Predictions

Creativity and authenticity uttered together may seem like a paradox. Some professional photographers may even frown at photography being creative. Sure, they would think of interesting angles, positions and subjects, but most would not go out of their way to heavily edit as authenticity was always important. There was a time that many dear readers may remember which saw programs such as Photoshop associated to those that wanted to cover-up lackluster shots and make themselves look better. In 2018, that is all expected to change.

A Creative Reality:

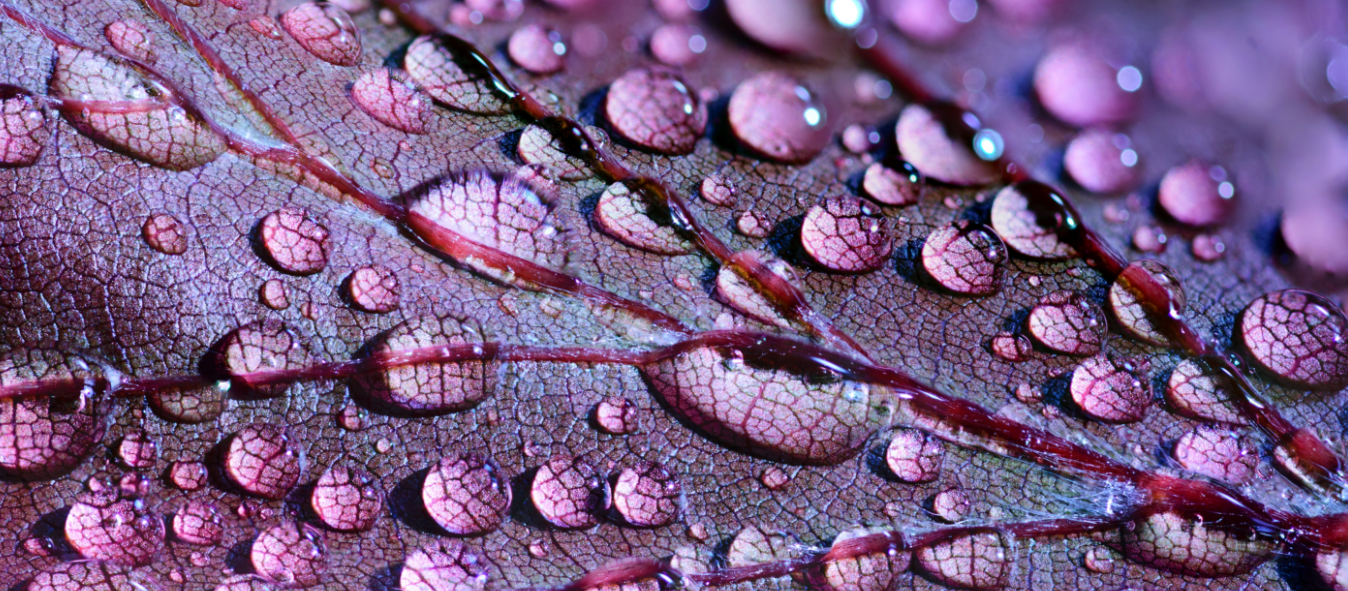
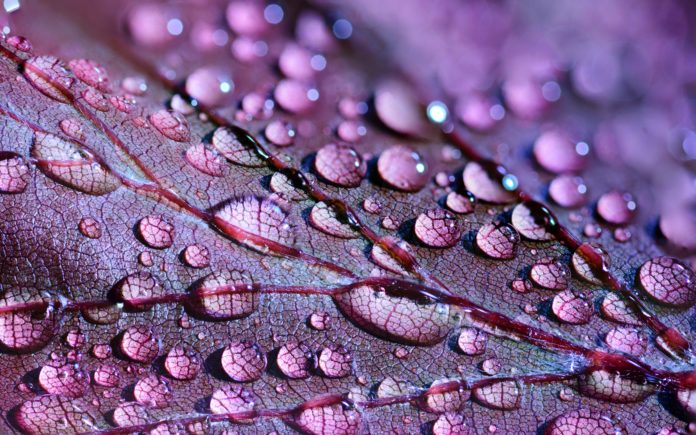
Creative reality, which at first may sound like a phrase borrowed from the propaganda archives of despot regimes, is actually supposed to convey a sense of beauty. The concept is supposed to blend reality with creative art. These could range anywhere from double exposure to infrared photography and color manipulation. This essentially shows photography as some form of fine art. Whilst this may annoy some, if this distinction is made from the offset, it shouldn’t have any issues. With this, artists are creating their own utopic worlds with colors set to have a warm feel to them, despite it appearing almost psychedelic.

Creative/ abstract photo of the fall. 

Serene Scene:

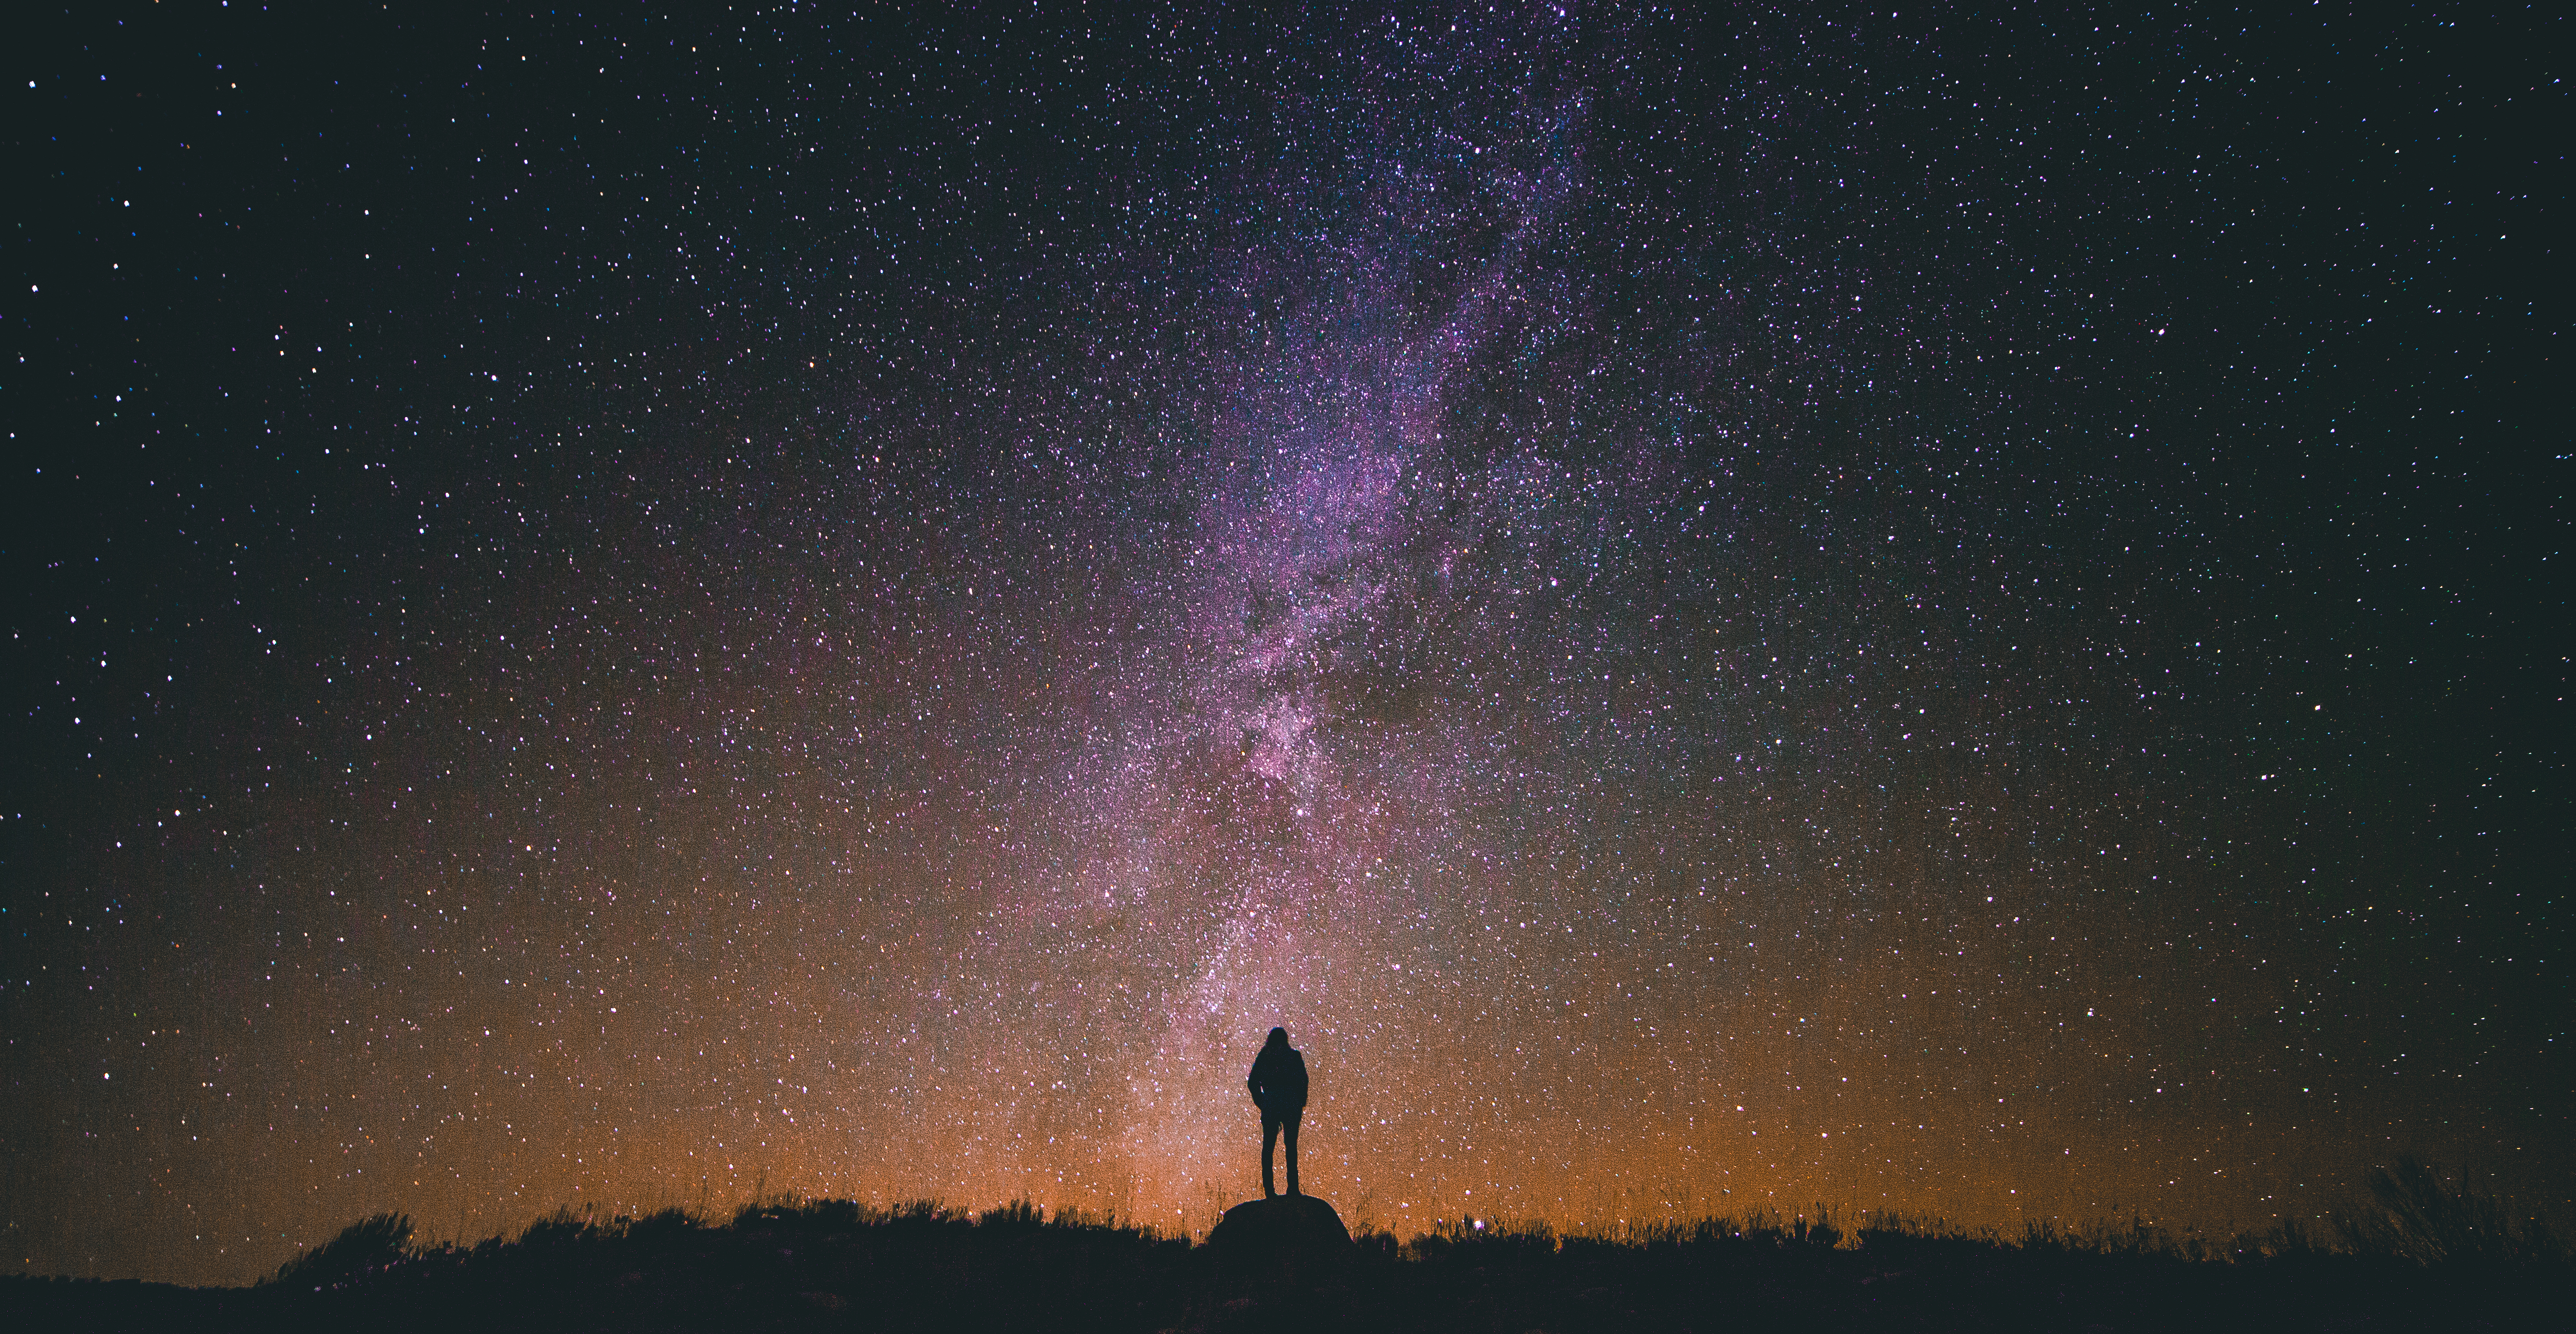
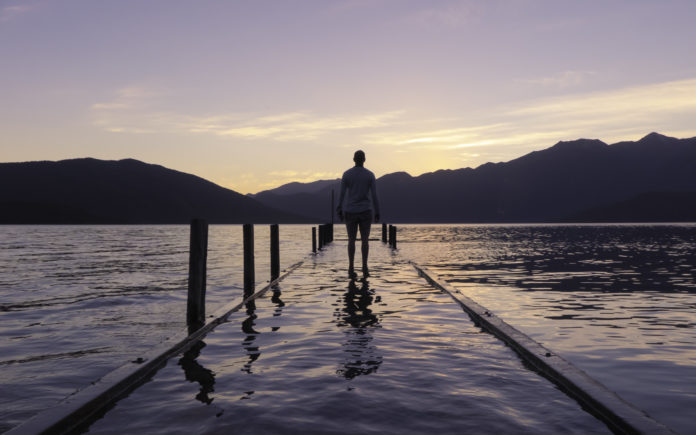
With most of the world’s population living in cities, this hyperconnectivity, photography is set to move away from various cityscapes to nature. Calm and tranquil scenes will start appearing with increased intensity in 2018.  It almost attempts to visually represent an existential crisis that is affecting the human, i.e. you. Whilst this may sound like a grand term, artists are merely asking the question of what is our connection with nature and how is the world turning its back on it. This is particularly relevant in the age of climate change and global warming.

Tranquility: people are increasingly reconnecting through their camera.

Changing Perceptions of the Self:

Identity is increasingly going hand-in-hand with fluidity. People are now willing and open to take on issues such as same sex marriage or gender equality – this has been reflected in the high impact photographs that should be making the rounds in 2018. This has also burst a whole embrace of multicultural photos, where people are more willing to code mix with cultures, embracing their roots. It often makes for a colorful and interesting blend that draws the reader. Even the Royal Family in the UK are embracing these kinds of shots.

Issues of equality and openness are set to feature prominently in photography in 2018.

A Historical Blend:

With this embrace of multiculturalism, historical portraits are also coming back into the fray. In general, photography is the most authentic way to relive a time period. One can see exactly how the people of a certain period lived and felt.  Actors like Jeremy Irons have even noted that the best practice for any role is to look at the people by examining paintings and photos – getting their expressions, feelings and general life at the time. In 2018, photographers are set to mesh modern photo taking technology, whilst incorporating traditional scenes, elements and even shapes.

Creating that old vibe in photos makes us reflect and enjoy the authenticity of a bygone age.

Inspired for ideas? We’d love to know what you plan on photographing in 2018. Embrace new techniques, experiment, but most crucially (as is the case for us in the Nixplay family) is to have fun, don’t be afraid to take a risk and you’ll be guaranteed to create precious moments with the camera serving as a gateway to memories that last a lifetime.

Nixplay offers consumer digital WiFi picture frames that blend well with the scene. Want to improve your photography or simply present those majestic shots in style – Nixplay frames are the perfect solution.

Bea is Nixplay’s Social Media Manager. She enjoys drinking coffee, reading about wars, and writing stories. Send her a message at beatrice.bisais@nixplay.com.

5 Top Tips for Taking Cute Couple Selfies

In the fast-paced real-time digitized world of today, the selfie has been the 12th most popular hashtag on the photography social media platform Instagram. To put this into perspective, over 1 million selfies are taken every day which means that after just a few minutes, there are already more selfies than all photographs in the 19th century combined.  

Clearly, the selfie is here to stay. That’s why we’ve put together our top 5 tips on how to make the most of taking a selfie with your partner. Read on to discover how to take cute couple selfies that you can treasure forever.

Our Cute Couple Selfie Ideas

1. Be cool and use fun filters

The results are quite spectacular and often very funny. You can use lenses, filters, face swap, text, stickers, emojis, and the drawing tool to add effects to your photos. When you take a cute couple’s selfie with one of these filters, it’s often very surprising!

New filters can be expected for each special holiday–the perfect opportunity to put our creative couple selfie ideas to the test. 

Filtered Couple Poses for Selfies

pinterest

2. Amplify emotional value and take photos in black and white

Black and white photography is a very special way to illustrate emotion between two people, so you should consider selecting the filter on your phone more often. It takes away from any distractions that a coloured photograph may pose, making you focus on the image. After all, when we look at a photo, we don’t focus on the subject, but the surroundings, too. It also allows for a timeless effect: As decades pass, the authenticity of such a photo never fails.

Stuck on a pose? Looking for something a bit more romantic? Looking into each other’s eyes with big cheesy grins should do the trick.

black and white selfie ideas for couples

favim

3. Be romantic

When people mention couple selfies, one of the images that often comes to mind is two people kissing. Being romantic in your couple’s selfie will leave you with an image that you can treasure personally and look back on as your relationship grows. From cuddles to kisses, there are plenty of romantic selfie ideas for couples.

romantic couple poses for selfies

pinterest

4. Be authentic and use a nature background

For those who aren’t big fans of the “lovey-dovey” stuff, you can opt for a more natural couple’s selfie. You can take your photos in a park, near a lake or beach, or even in a forest—which is also a great excuse to head out on a romantic walk! A nature background, or one that gives off that appearance, offers a colourful and pronounced backdrop that will change as your relationship grows. The opposite of a black and white filter, a bright background often adds more depth to the image that catches the eye and draws people in.

natural couple selfies

pinterest

5. Be original and try a funny face, position or angle

The best cute selfie idea for couples is one that leaves you laughing every time you look at it. The more original you are, the better the photo is. You can use various accessories (e.g. oversized glasses, pretty flowers, and crazy hats) or even your partner’s hair, like in the example below. Taking your photos from different positions and angles may also help you get that winning shot; be unique and try using a selfie stick from the ground or set your camera on timer for a different perspective.

creative couple selfie ideas

pinterest

Displaying Your Cute Couple Selfies

A great way to look back on your couple selfies at home is to show them off on a Nixplay Wifi photo frame. You can send them straight from your smartphone with the Nixplay App, where you can store and display them all in one place.

cute couple’s selfie displayed on a Nixplay frame

Bea is Nixplay’s Social Media Manager. She enjoys drinking coffee, reading about wars, and writing stories. Send her a message at beatrice.bisais@nixplay.com.

A Photographer’s Guide to the Universe Part 2

Nixplay is excited to present the first in-depth article of Explore More, a series of content pieces that revolve around unique photo-taking adventures, creating moments and chronicling memories. Be creative, try something new and Explore More. Stay tuned throughout 2018 to further unleash your sense of adventure and love for photography.

Special Note: This is the second part of a special series; part one provides you with a cosmic calendar of all the marvels that the world of astronomy presents for 2018 and helps you set your coordinates to increase your chance in witnessing shooting stars, eclipses, planetary alignments and everything in-between. 

2018 is setting out to be an exciting year for all space buffs that are fascinated with a galaxy far, far away and we don’t mean the latest Star Wars movie. The year has already started out with a big bang thanks to the appearance of the year’s first supermoon on none other than New Year’s Day, a phenomenon that allows space geeks to see the moon 14% larger and 30% brighter, making it one of the easier space events to photograph. Yet, although we live in an age of smartphones where some take a selfie as soon as they stumble out of bed, space photography remains elusive in the eyes of many. In the second half of our space odyssey, we discover tips and tricks that will shine a light on the possibilities and relative ease in capturing that intergalactic masterpiece.

Eclipses and Planets

You may still remember August 21, 2017 , where a large chunk of the US population was exhibiting strange behavior by looking up at the sun. No, they were not out there to work on their tans, but a totality, a complete eclipse where the moon completely blocked out the sun. Gasps and cheers were ambient reminders of the excitement many experienced. Although this didn’t resonate across the animal kingdom with many wondering around very confused indeed. Animals aside, if you were watching the news back then, you would have seen people around with smartphones to capture this momentous occasion, except many struggled to get a perfect shot.
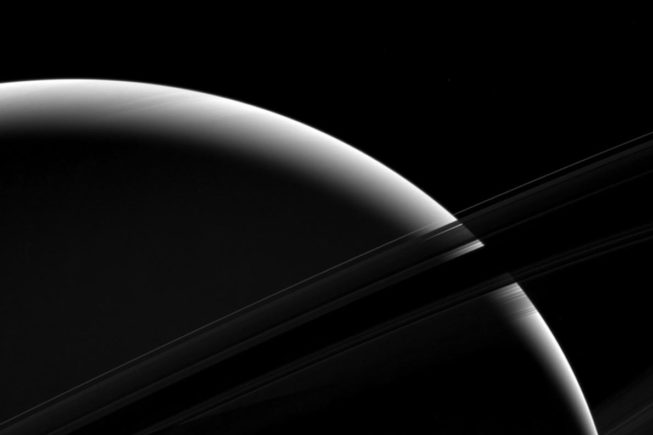
Saturn with its rings taken by NASA JP-Caltech Space Science Institute.

For those in the know, one of the more widely used methods to capture this beauty involves a telephoto lens and whilst it may sound like a mad scientist’s experiment, it’s much easier to use than you may think.  There are two avenues to pursue to capture a good quality, presentable image of planetary sightings (depending on what planet, time of year and how far away from the sun it is) and eclipses  – either with a DSLR camera or smartphone.

The superior method that can create that money-making shot, quite literally, is by using a DSLR camera. Your gear needs to be complemented by a telescope and telephoto lens, especially if you want to get close-ups that go as far as detailing the surface of the object being eclipsed. The ideal range that the focal range should be is 500 to 2,000mm, with a Barlow lens or 2x teleconverter giving it the extra boost. It is very easy to get carried away in all the fun and excitement of new, shiny, heavy equipment, we know.  This is compounded with the fact that most cameras have smaller APS-C sensors, which basically are smaller than the standard film frames, causing the camera to focus on a smaller surface area and cropping out the edges. You would need to either use a focal reducer or using a telescope with a lower focal length.

For folks that don’t want a workout with bulky, expensive equipment, lunar eclipses should be your go-to choice. Whilst it would obviously not allow you to get the most out of your shot, it’s still a method that will help you to capture the eclipse, in focus, which could turn out to be a good piece to add to an album. This doesn’t mean that you can aim your camera directly at the eclipse and hope for the money shot. Far beyond anything of value, you’ll be hard pressed to figure out whether it’s a picture of an eclipse or one that was set off accidentally whilst your phone was in your pocket. ‘Afocal projection’ is the go-to mobile method. Whilst the term may make your sincere writer sound smarter, all it means is that you point your camera right into the eye-hole of a telescope and it should be able to amplify the image to a good, presentable size. You would need to hold the camera steadily or on a tripod, ensuring that the moon looks to be in the center of your camera.

Seeing as eclipses are not fully static, the best practice is to ensure you move the camera every 1.5 minutes. Be sure to keep checking the images that you are capturing; if you start seeing black edges around the photograph, it means that you’re holding the camera too far away from the telescope’s eyepiece. Zooming in slightly is fine, but make sure you don’t zoom in too much – that low-resolution graininess is an enemy of the photographer. Of course, as the technology within phones develops, including their inbuilt cameras (think Huawei) these will only be getting clearer and crisper.

Your checklist should include a spare batter or portable charger at hand (for most eclipses a charged phone or camera will be enough due to them usually not being much longer than 7.5 minutes) and as Anthony Aveni, an astronomer and anthropologist writes in his new book, ‘In The Shadow of the Moon’, you only have 2 minutes and 40 seconds to capture that perfect picture during eclipses.

Comets and Shooting Stars

When it comes to comets and shooting stars, your job may get a bit more difficult. Characterized by their rapid movements across a larger plain to the frustration of even some of the most-famous astronomers that have walked this earth, including David H. Levy: “Comets are like cats; they have tails, and they do precisely what they want.”

Levy’s description stems from the fact that unlike eclipses, the moon and other planets, shooting stars and comets are moving objects that can cover a large plain.  To conquer this issue, wide angle lenses with a large aperture are vital, even when the light is not very vivid – f/2.8 and below (which means faster) would be an appropriate. An f/28 would be good with an ISO 2000. A wide-angle lens would increase the probability of covering a greater territory, thus increasing your chance of a getting the right shot, at the right time – 20mm to 50mm is the range that most photographers go for.

Debris from Halley’s comet causes the annual Orionid metoer shower. Photo by NASA/ESA/Max-Planck-Institute for Solar System Research.

Due to the motion of shooting stars and comments, a good idea would be to preset your camera. That is, unless you have titan fingers of steel and the dedication of a warrior – mostly since there are no warning bells and you cannot precisely calculate the time down to the minute, yet alone seconds in which they take place. The safest bet is to set your camera to capture photos automatically, to which an extension is needed. Known as the intervalometer, it sounds like a prop taken out of a superhero movie, but acts as a cable release that does the photo-shooting for you, with all the appropriate settings pre-programmed onto your camera – including the length and exposure and timing between shots. Finally, like with eclipses, a tripod is needed for stability.

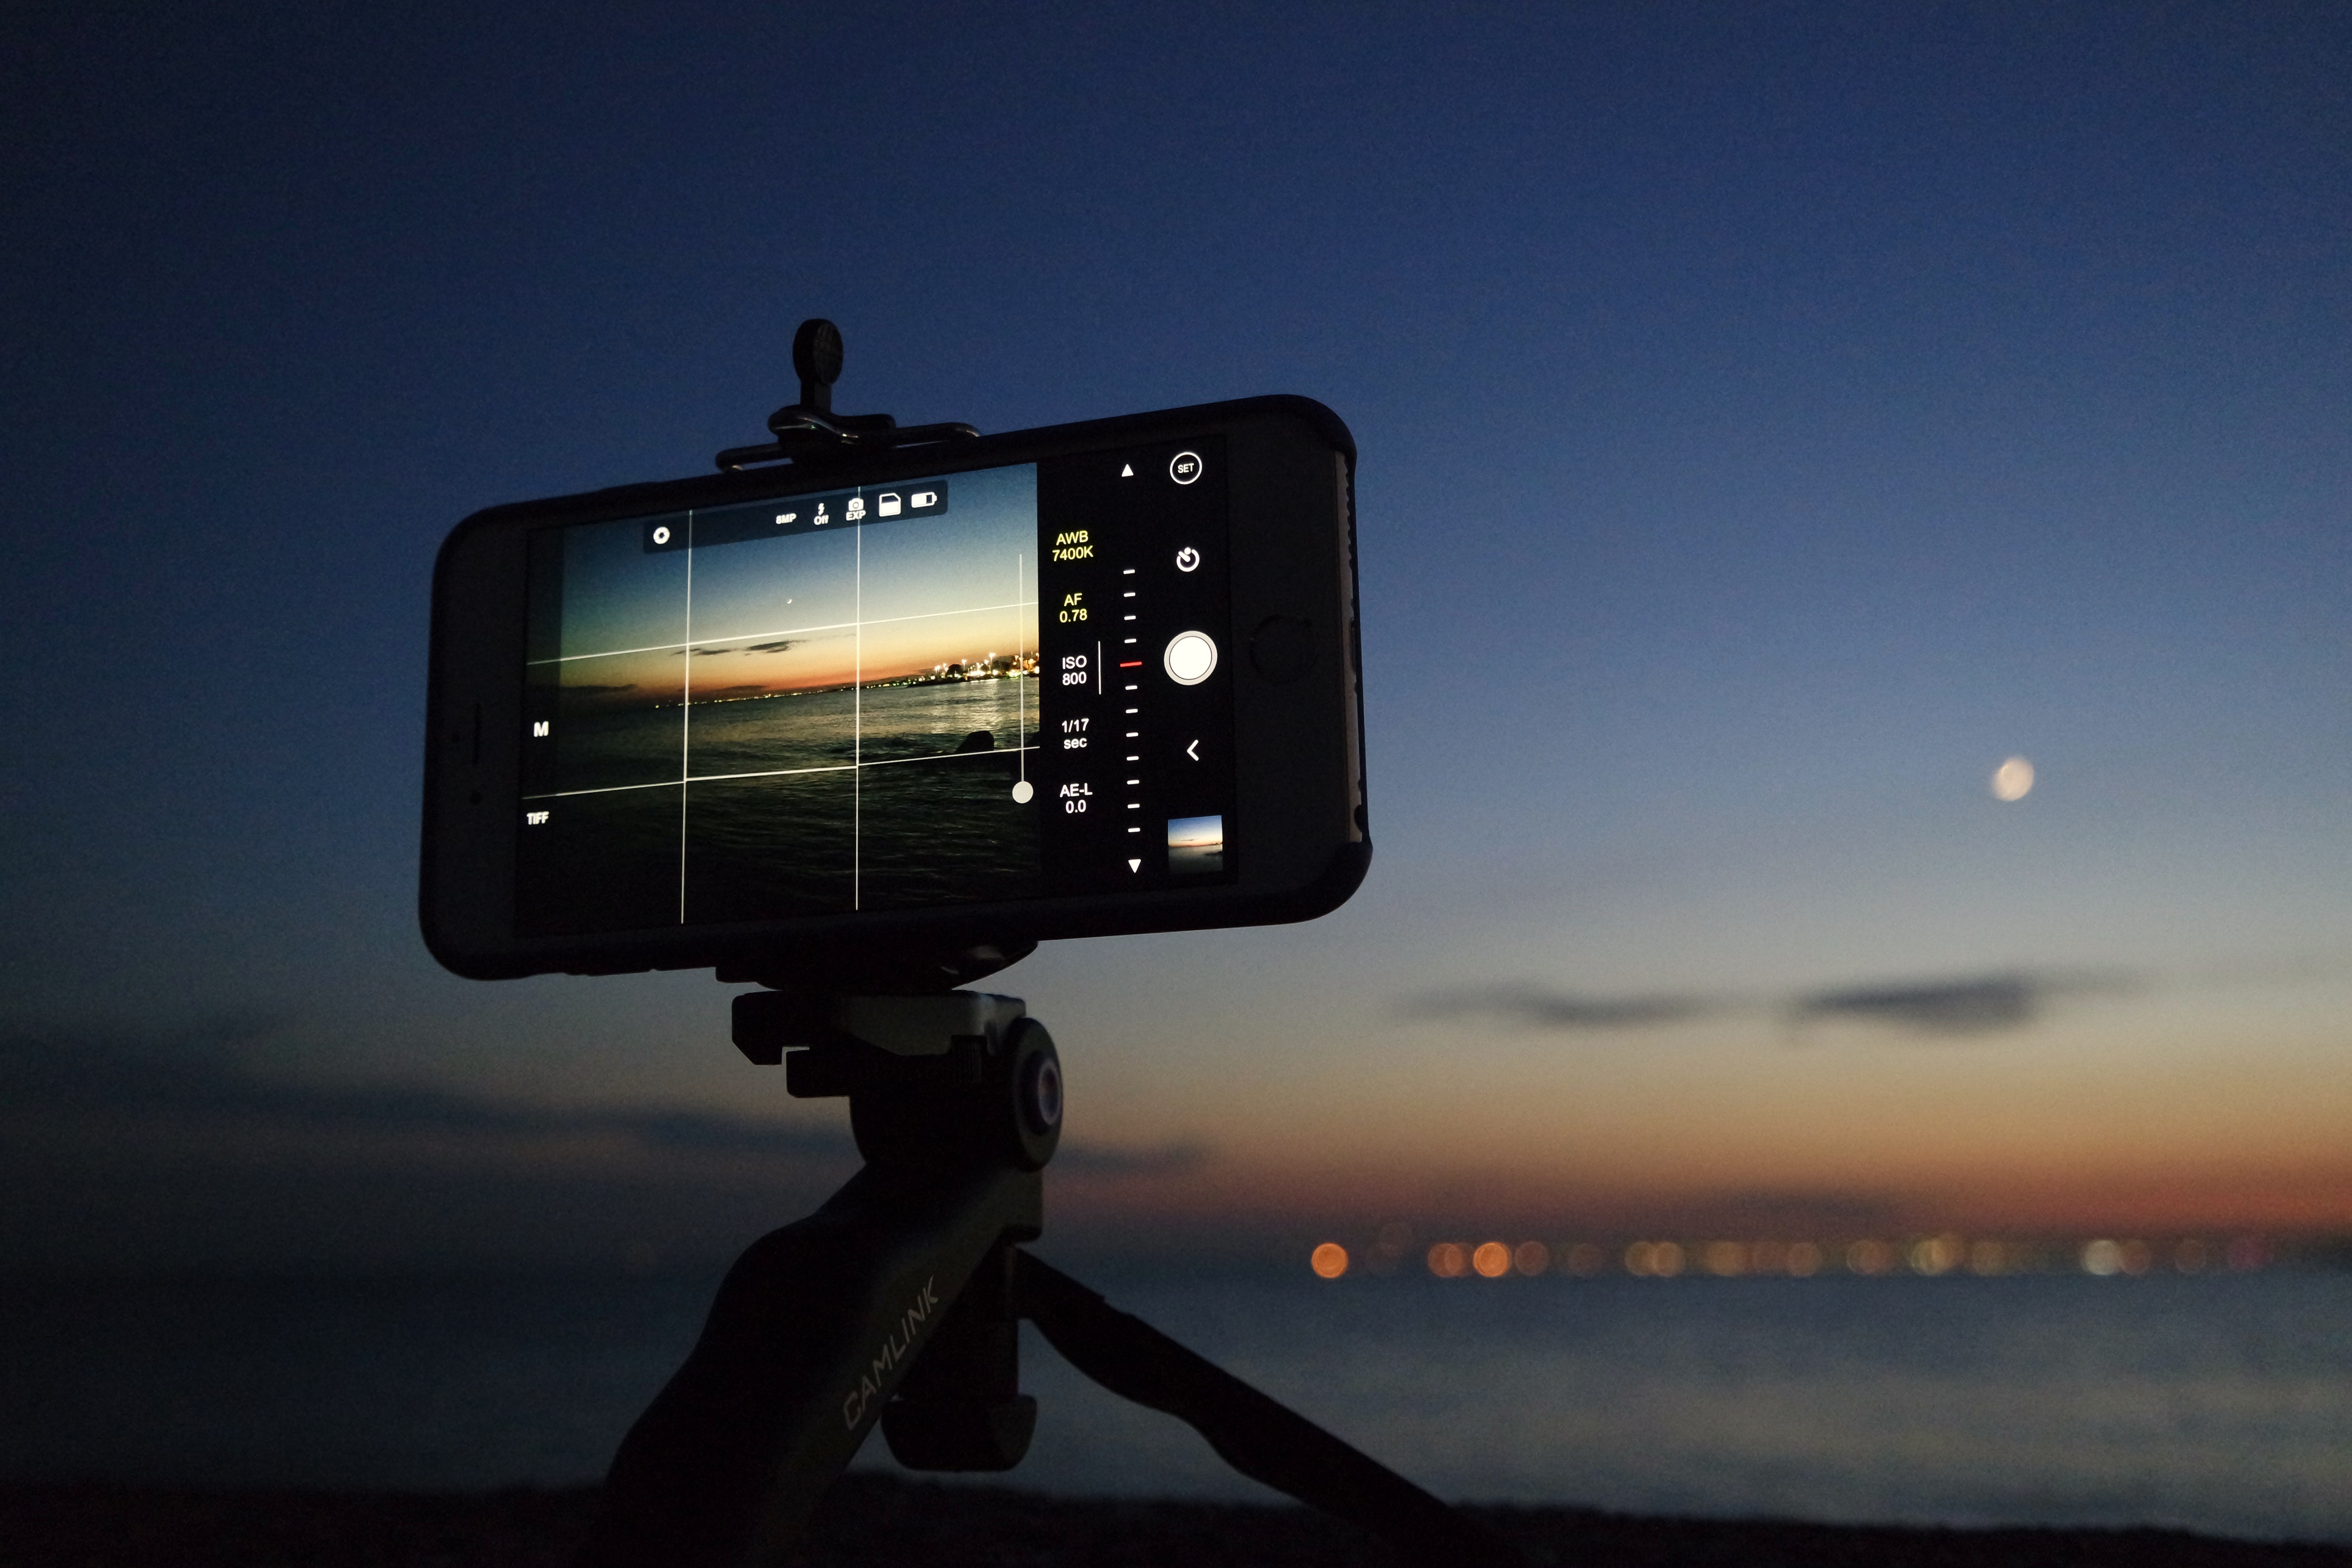
Some may not have or want to spend money on expensive camera gear and the good news is that these lovable moving rocks can be admired and recorded by anyone from your 6-year-old to your grandmother with the help of that little-known device, the smartphone. A good tool to use would be to download an app called ‘NightCap Camera’ and once in can switch on meteor mode that automatically adjusts the settings for you to the best possible for the purpose. This nifty addition helps you take around 750 photos with a 5 second exposure time. Undeniably, like photographing eclipses, moon(s) and planets the pictures will be no-where near as good as on a DSLR, but despite their movements, shooting stars and comets would be easier to capture due to them being easier identified in the night sky even with the naked eye.

Comets are like cats; they have tails, and they do precisely what they want.

David H. Levy, Astronomer, science writer and discoverer of comets and minor planets

Yet again, the shooting environment is the most important aspect. Werewolves away, you need to make sure that the moon is not out, as having it there would only decrease the probability of photographing these shooting stars by 50%. Also, having multiple cameras is an even safer bet if you’re serious – the old phrase strength in numbers rings true here. Confusion can arise with airplanes and satellites; they’re a very real presence and many amateur photographers often confuse the two. As silly as this may sound to some, but having a search for some images of each would help you most to prevent dud shots.

The best way to make sure you’re thoroughly prepared and if you have time, try practicing. Lightening and flying rocks in our galaxy may have nothing in common, but is a great way to practice capturing strokes of light in the night sky. Again, if you are going to try, make sure you stand in a more sheltered place – your safety is our priority. Still confused or think that this is a job that only Albert Einstein is qualified to do? Don’t be, here’s a step-by-step to help you:

  1. Check the weather, making sure it’s clear and isn’t on a night whether and where the moon is out in force.
  2. Pack your camera gear including the tripod, spare batteries and a nice chair and snacks as you’ll probably be out there for an hour at the very least.
  3. Find a dark spot that has no light pollution. If you have coordinates as to where best to view the solar event, make sure it’s an appropriate location.
  4. Set your camera up in the right position, facing the correct side depending on where the object is.
  5. If not already, make sure your camera is set to the correct settings: aperture open, shutter speed on B/ Bulb and a manual lens control.
  6. Attach your intervalometer if you have one
  7. Align the infinity mark on the lens, and ISO to either 800 and 1600. This can be changed easily if it’s off during your test run
  8. Test out the gear to make sure it works and your sample shot is in focus and has the appropriate exposure settings (20-30 seconds is the usual range)
  9. Wait for the event to kick-start your career in taking space photos and most importantly, enjoy this unique experience!

Bea is Nixplay’s Social Media Manager. She enjoys drinking coffee, reading about wars, and writing stories. Send her a message at beatrice.bisais@nixplay.com.
A Photographer’s Guide to the Universe Part 1

Nixplay is excited to present the first in-depth article of Explore More, a series of content pieces that revolve around unique photo-taking adventures, creating moments and chronicling memories. Be creative, try something new and Explore More. Stay tuned throughout 2018 to further unleash your sense of adventure and love for photography.

Special Note: Part 2 will be published on Monday, February 15 and will provide you an ultimate guide to how to take photos of space.

2018 is setting out to be an exciting year for all space buffs that are fascinated with a galaxy far, far away and we don’t mean the latest Star Wars movie. The year has already started out with a big bang thanks to the appearance of the year’s first supermoon on none other than New Year’s Day, a phenomenon that allows space geeks to see the moon 14% larger and 30% brighter, making it one of the easier space events to photograph. For those who were recovering from the flows of champagne and confetti, don’t fret, there will be an astrological event nearly every month – plenty of opportunities to get your inner geek on. The list below shows some of the highlights of this calendar year and when you should me making that giant leap out of your door and onto prime space gazing real estate.

Jan 31st: Super blue moon eclipse
Feb 10th:
Line of planets with moon in between
March 31st:
Second blue moon
April 22nd – 23rd:
Lyrids meteor shower
May 6th – 7th
Eta Aquarids meteor shower
June 27th:
Saturn at its closest to sun
July 31st:
Mars closes to Earth (next event with such a close proximity will happen in 2025.)
Sep 7th:
Neptune at closest approach to Earth
Oct 21st – 22nd:
Orionids meteor shower
Nov 17th – 18th:
Leonids meteor shower
Dec 12th:
Comet 46P/Wirtanen passes by Earth

You probably remember thinking about how amazing it would be to experience space from daydreaming at school to looking in awe at the ever-growing catalog of space documentaries. This awe at the immensity of our solar system makes it a fascination to many and it is that awe that has seen a rapidly increasing contingent of star gazers that want to go beyond simply looking up at the stars, creating a trend of space photography. The digitally disruptive world of today has made this hobby accessible to a winder audience. Yet many people who try their hands on capturing stars and planets in the night sky often struggle with issues ranging from struggling to find and capture a planetary sitting or eclipse due to distance and lack of visibility to not knowing how to get the best shots when there is movement. Then there are those who, probably like you, thought this was a job for the professionals. And here’s the surprising bit: it can even be done from a smartphone.

In part 1 of our series, we list out the key highlights of space watching in 2018. Find out what’s hot and gassy or bright and beautiful for space photographers. At the same time, we will act as your guide and act as your de facto GPS for finding the best perch to get that award-winning shot. No, it’s not Pokemon Go, but a guide for the stars, planets and moons of 2018 – or at least those within site

If there’s one thing in common between US president Donald Trump and NASA, it would have to be location, location, location. When wanting to film one of these events, you can’t just leave your house, look up and expect to see these wonders of our Universe.

There is an interplay of location based factors that range from the part of the world you live in to the environment around you. Firstly, and this may seem like an obvious one for many, is light pollution, a common occurrence, especially in the world today, where for the first time in human history, the majority of the population now live in cities. The Big Apple is a bad apple for space photography.

Positioning yourself right in 2018 starts with the Lyrid meteor shower, peaking in the morning just before dawn on April 22. The general direction to look is east, although to be more precise, there is a table that can help calculate your exact positioning; whilst this website should also help. It’s best viewed from the northern hemisphere, with the mid-southern hemisphere coming in a close second. Eta Aquarids  is the most inclusive when it comes to viewability as you can witness the spectacle from anywhere in the world, whilst our latter couple in November can be seen from both hemispheres after dark; for the Leonid’s your best bet it to look between the east and the point right above you, whilst for the opulent Orionid all you is look straight up above your head.

Saturn, shines brightest, or is in opposition on June 27. Its general behavior on the day is much like the moon’s, rising at sunset, appears at its brightest south at midnight (give or take a couple dozen minutes) and sets in the west once sunrise hits. Generally, it should be right on the other side of the sun. Location-wise, as long as you’re sensible and are in a dark area without any light pollution and where it’s not overcast, your chances of witnessing this wonder is quite high. This site gives you exact coordinates of where to find the gassy planet in your location – make sure your device’s location settings are enabled.

Saturn with its rings. Photo by NASA JP-Caltech Space Science Institute.

If you ever get stuck or feel hopelessly lost in the hunt for shooting stars, the best tip would be to look at what constellation the meteor appears to radiate from seeing as each meteor is named after one. In less scientific language, constellations are groups of stars that form an image – some of the names may even be familiar to you. Alternatively, you can download an app known as ‘Starglobe’ on your phone

As for catching our comet, you’d be best placed in the Northern hemisphere. Do keep your expectations realistic seeing as scientists cannot pin-point how bright it would be at present, but they do believe it’ll be the brightest comet in over 5 years, passing 7.2 million miles away from earth. It can be located quite easily as it passes winter constellation Taurus, the bull. Searching for and printing out the constellation would be the best way to prepare for the day.

Whilst we are summarizing this without going to an encyclopaedia of GPS coordinates, we have sifted through the data and provided some useful tips to get you on your way and explore something new. Once the cosmic event occurs, be sure to take as many photos as you can, to maximize your chances of taking a good quality photo.

Touch-ups

Many of the photos that you see related to space on a lot of the top photography journals and other publications are not one-shot wonders. Professional photojournalists that partake in various space photography often do a lot of editing to the shots they get. Let’s face it, shooting movable objects in pitch black is not easy even for the most experienced. Whilst your mind may wonder to programs such as Photoshop, a truly successful space image will go beyond that with sequencing and layering. To find out more, stay tuned to our article to be published on January 15, where we explore the best ways to edit and build upon photos long after the camera is packed away.

Share Your Discoveries

Want a good opportunity to show off and gain likes? Your space-filled gallery will be a guaranteed winner; instantly share photos with anyone in the world through your social media apps, messages and as we recommend, the Nixplay app, which manages photos and albums on digital picture frames. It would also be irresponsible of us not to note that starring into the sun directly – an exciting photo taking opportunity can become a tragedy. Like a good astronaut, a good photographer of the Universe is universally ready – get the right gear, prepare, plan thoroughly and enjoy the ride!

Bea is Nixplay’s Social Media Manager. She enjoys drinking coffee, reading about wars, and writing stories. Send her a message at beatrice.bisais@nixplay.com.
3 Tips for Incredible Portrait Photographs

Three Portrait Photo Tips for better pictures

“Make sure I look great,” we’ve heard that request too. Every time a friend or family member asks us to take a portrait photograph, we get a little competitive to make sure it’s the best portrait photo of them. After a lot of trial, error and reading we’ve come up with tips for incredible portrait photos. No hidden agenda, except, of course- we want the pictures on your Nixplay Photo Frame to look great!

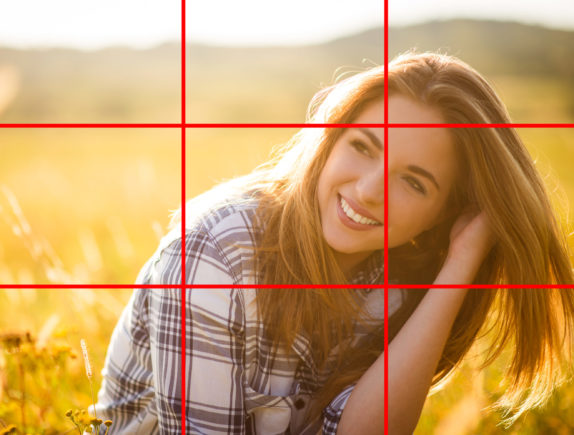
1.Use the rule of thirds:

Firstly, the rule of thirds is a very basic portrait photography technique that can be quite hard to master ( talking from experience.) Mentally break down the portrait photograph you’re going to take into 3×3 squares. Remember viewers eye’s are most drawn to the intersection points in the grid. So think about what the most important parts of the photograph will be and place them accordingly. Pictures using the rule of thirds, look really great on Nixplay Digital Photo frames like the Nixplay Seed. Place the frame in covered patio or the living room and you will make your house guests jealous!

2.Don’t be scared to get close:

Our second portrait photo tip is that we’ve observed a lot of portrait photos and noticed that often, the subject is too far away. To make an impact, the subject needs to be big enough to be seen clearly and make an impact on the viewer. Now, don’t take that as – get them so close that we can only see the blackheads on their nose. I mean, unless that’s what you were aiming for. Close up portrait photos look great on wall mounted Nixplay Digital photo frames, the Nixplay Edge is a great choice.

3.Focus on the eyes:

Here’s our third, final photo tip for portraits. When looking at a portrait photo, notice that your eyes will always look at the subject’s eyes first (no, that was not an intentional tongue twister.) Make sure the eyes are sharp and in focus. Additionally, if you want to make sure the lighting and angle is perfect- move your camera around until you can see the light reflect in your subjects eyes! 

Bonus Technical tip: Exposure Compensation

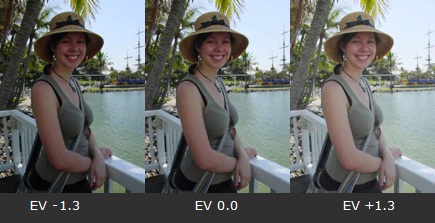
Keep in mind that in photography, one exposure setting does not fit all. Your camera may underexpose someone of a lighter skin tone and overexpose someone with a darker skin tone.  Backgrounds of extreme light or darkness can also trick the camera. The easiest way to deal with this is to navigate to your camera’s exposure compensation control. To lighten up faces go dial up the stops ( i.e. +1) and to let less light in dial it down (i.e. -1) The Nixplay Iris dims and brightens your photos based on the light level- lucky for you that once you’ve fixed your exposure compensation, you don’t need to worry about the display on your Nixplay digital photo frame. 

If these tips were helpful, share your enhanced portrait photographs with us in the comments section or tag us on facebook, instagram or twitter.  We’d love it if you show us how the portraits look on your Nixplay Digital Photo Frame! #Nixplayphototips

Bea is Nixplay’s Social Media Manager. She enjoys drinking coffee, reading about wars, and writing stories. Send her a message at beatrice.bisais@nixplay.com.

Page 11 of 24

Powered by WordPress & Theme by Anders Norén